Saturday, November 22, 2014

DIY Fix: Paint your toilet seat so it's like new again!

diy toilet fix paint toilet seat get rid of marks look new again
"Want to see my toilet?" said no one. Ever.
Well, except for me that is, because I seriously want to show you my toilet.

This DIY fix was just too good not to share because it worked like a charm!

Why are you so worried about your toilet, you ask? We are in the process of moving, and by in-process I mean I think about how much I need to pack. Every day. And then I blog about painting my toilet. 

We are finally leaving a loud city apartment and upgrading to a house in the quiet tranquility of a rural small town, just outside Seattle. We're really excited, but the packing, cleaning and moving part isn't so much fun (especially since in July we actually packed and moved everything out, but due to a bad situation, ended up having to move right back in. Blah!).

So, in an attempt to leave this place better than we found it (and a full deposit refund!) we need to pretty up the old toilet seats that have been cleaned so many times the paint has started to rub off. They're not gross and dirty I promise! Just in need of a little re-painting so they look as clean as they really are.

I stumbled on this Toilet Seat Makeover post that gave me the how-to's, and promptly ran over to Home Depot to grab some spray paint. And away I went.

HOW TO PAINT YOUR TOILET SEAT SO IT LOOKS LIKE NEW

WHAT YOU WILL NEED (*product links included)
  • Rust-oleum Painter's Touch 2x Ultra Cover Spray Paint + Primer in Gloss White - through Amazon or Home Depot (as recommended by the other website & worked great; unless your toilet's a different color)
  • A well-ventilated area such as outside or a garage  (*I tried to spray paint the toilet seat in the bathroom as the other site directed, but I fumigated myself. Gah! So I took it outside, even though it was like 30 degrees. I'd rather freeze than faint.)
  • Newspaper, painters cloth or other cover that can get painty
  • Clothes to spray paint in
do it yourself fix toilet seat spray paint look new again
PAINTING INSTRUCTIONS

STEP 1: Give your toilet a quick and thorough cleaning, and let the toilet seat dry completely.

STEP 2: Remove your toilet seat (SIMPLE! just use a flat-head screw driver) and bring toilet seat to a well-ventilated place

STEP 3: Use your drop cloth or newspaper to cover areas of the toilet seat you don't want to get painted.

STEP 4: Follow the directions on the spray paint can and shake til its well mixed

STEP 5: Spray a light coating 6-10 inches away on the toilet seat and let it dry. Don't spray too close or over spray or you'll get drips and bubbles. I waited about 30 or so minutes in-between each coating.

STEP 6: Repeat step 5 as many times as you need to for desired results. (*previous website warned not to over-spray or it won't look good)

STEP 7: Once completely dry (which according to the can, and by can I mean paint (pun fully intended), it should be "dry enough to handle in 1 hour/ fully dry in 24 hours"), & return your *LIKE NEW* toilet seat to your throne.

It really is a great transformation because this re-painted toilet seat now looks as clean as it is! It will sparkle and shine so much they may give us a bonus in addition to our deposit! Ha! Not likely. But the new tenants will be happy with their toilets, and what's not to love about that?

Now if you'll excuse me, I've got to go pack! ;)

*This post contains product links, added for your convenience. As an Amazon Associate I earn from qualifying purchases.


Where you'll find me:
SHOPS: Etsy: Shannon Sorensen Designs + Fairface Washcloths AND FairfaceWashcloths.com
FACEBOOK: SSorensenDesigns AND FairfaceWashcloths
TWITTER: @ShannonSews1
INSTAGRAM: ShannonSorensenDesigns AND FairfaceWashcloths
YOUTUBE: youtube.com/ShannonSews
SUBSCRIBE (never miss a post!): Subscribe to ShannonSews
BLOGLOVIN: ShannonSews on Bloglovin

Saturday, November 8, 2014

Delivering Fairface Washcloths™ to Oprah and Gayle King

Fairface Washcloths and Oprah and Gayle King
This weekend I had the unique and exciting experience of having my Fairface Washcloths™ gift sets delivered to Oprah and Gayle King, while they brought their special The Life You Want message to Seattle. How I wish I could have been able to deliver them in person to thank them for their incredible contributions and hear their inspiring words!

A friend of mine, who is the niece of the makers of Lisette L Pants that Oprah wears and loves, had the rare opportunity to go to the VIP tent where Gayle and Oprah greeted guests, took pictures and socialized with the Seattleites and others who traveled from near and far to attend this event.

My friend was able to hand-deliver these Fairface Washcloths combo cloth gift sets (so they could experience the best of both Fairface Washcloths styles) to Gayle! I feel so privileged for the chance to get products that mean so much to me into the hands of people I admire so much, and am so grateful for a friend willing to go out of her way for me!

Giving your etsy products to celebrities

fairface washcloths, celebrities, branding, product inserts and marketing strategiesPicture your handmade etsy products (& here) in the hands of two of the world's most influential people. No pressure! Ha! Each stitch had to be perfect, but honestly, I do that anyway for all my products because I'm a perfectionist and control freak. In this case that's a good thing, right?

Reviewing Product Packaging

Nothing kicks your buns into gear to do a hard and fast review of your product and its packaging than preparing gifts for celebrities!

I had to ask myself a few questions:
  • Does my packaging clearly portray the brand and its message?
  • Does it describe the product?
  • Does it entice the customer to want to use it?
  • If given as a gift, does it tell the receiver what it is and what's so great about it? 
  • Does it direct customers to your website, & where to find you in social media?

I always figured if someone bought my product, they already knew what it was, so no need to include much more information about it since they already knew what it was! Right? WRONG! (loud buzzer sound)

As I began reviewing my packaging, all at once I thought of it in a different way: What if I was giving my product to someone who had never seen it before? (i.e. gift giving). Oops! Time to regroup.

get your etsy products to celebrities like oprah and gayle king
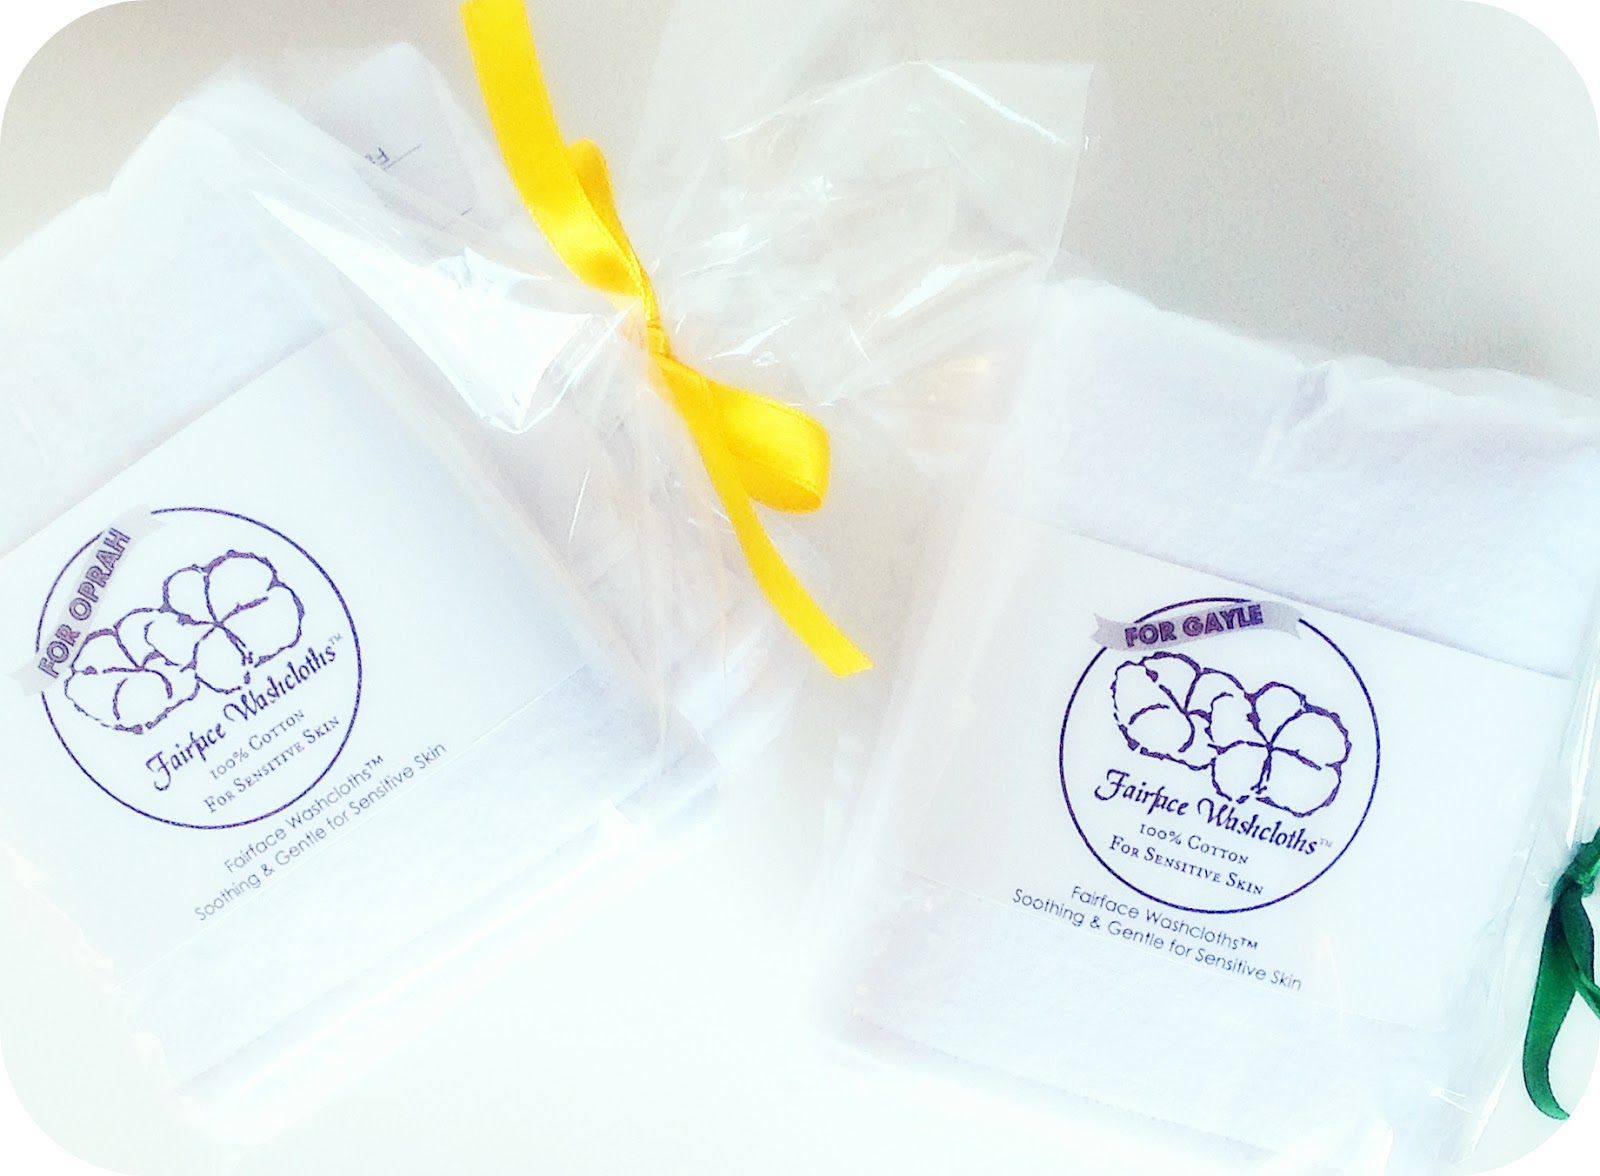
I created a special product label for Oprah and Gayle because I wanted them to know this was a special package made this just for them, and included updated product inserts with a better description of Fairface skincare Washcloths™ and what makes them special and unique.

This experience, giving these Fairface Washcloths™ Combo Package of 4 gift sets to Oprah and Gayle, not only gave me a once-in-a-lifetime opportunity to hand deliver a product (that is my heart and soul), to 2 people I admire and love, but to also give me valuable insight into my marketing and branding efforts.
(P.S. - That's why its important not to spend loads of money on marketing materials as you are growing your product so you can change and evolve as needed without wasting a lot of money on tossing and updating marketing materials.)

I'm so grateful for a friend willing to go out on a limb for me, as well as carry some extra bulk in her purse, to get these packages to Oprah and Gayle this weekend!

Fingers crossed they'll love their new Fairface Washcloths™ as much I and my customers do! Who wouldn't love a soft and soothing skin care facecloth? Hope they will say the same! ♥


celebrity skin care best face cloths and washcloths, soft, gentle, rosacea
Fairface Washcloths™ are an exclusive product of Shannon Sorensen Designs and are available through our website: FairfaceWashcloths.com
& our Fairface Washcloths Etsy Shop

→Find the Combo Package of 4 gift set that Oprah and Gayle King received here

LIKE Fairface Washcloths on Facebook 
FOLLOW Fairface Washcloths on Instagram 
TAG ALONG with Shannon Sorensen Designs on Twitter

Saturday, September 13, 2014

Fairface Washcloths™ promo code! Best washcloths for sensitive skin

It's been quite busy around here! Summer came and went in a blink and all at once it was time to head back to school! Time. Moves. Fast!

I've been working like a dog sewing and growing my Fairface Washcloths™ brand. I have EXCITING and I do mean exciting, like I-can-hardly-keep-myself-contained-and-almost-blurt-it-out-at-any-given-time exciting about new Fairface products just on the horizon! Trust me, you'll love them like I do! I'm hoping to launch them by the end of October, if not sooner. Will I be able to hold out?!

best face cloths washcloths for rosacea and sensitive skin fairface washcloths
For now, I'm happy to share (although this isn't THE big announcement) that I've opened another shop, exclusively for Fairface Washcloths™ products! Yay!

And to celebrate this virtual ribbon cutting, I'm offering a week-long promotion for 15% off any Fairface Washcloths™ product order.

Use code: FFWC14 at checkout through the new Fairface Washcloths shop; good thru 9/20/14.

These really are the best washcloths I've ever used for my Rosacea-prone skin. They soothe and calm my face like no other cloth can. My sensitive face just can't tolerate harsh textures and the smoothness of the soft flannel does wonders.

Fairface Washcloths™ allows my skin to feel clean and clear, without getting all red and irritated like it does with regular washcloths. If you have sensitive skin, or know someone who does? You need to try them. I've had so many people tell me how much they've helped improve their sensitive skin! They are my gift to the world! And I hope they'll be a gift for you as well.

>>>Be sure to follow us on our new FairfaceWashcloths Facebook Page for future promotions, skin care tips and new product announcements! (because you know they're coming!!)

Well, that's it for now. So many things left unsaid. So many tutorials part-way done. So many projects swirling around in my head. See? Not much has changed but the calendar. Hope to be back soon sharing some fun tutorials! ♥


softest rosacea washcloths face cloths sensitive skin fairface washclothsFor more about Fairface Washcloths™, the softest washcloths and face cloths for sensitive skin:
VISIT: FairfaceWashcloths.blogspot.com
COMING SOON: FairfaceWashcloths.com
SHOP: FairfaceWashcloths.etsy.com


SUBSCRIBE (never miss a post!): Subscribe to ShannonSews
BLOGLOVIN: ShannonSews
FACEBOOK: SSorensenDesigns AND FairfaceWashcloths
TWITTER: @ShannonSews1
INSTAGRAM: ShannonSorensenDesigns
SHOP: Shannon Sorensen Designs + Fairface Washcloths and Fairface Washcloths
YOUTUBE: ShannonSews

Monday, August 18, 2014

Baby Blanket Coupon Code - Great baby shower gift!

Looking for a sweet nursery blanket, baby blanket or toddler's comfy lovey? 
{Snuggly Soft Bright Owls + Plush Dotted Minky Blanket = best of both worlds}
For a limited time, I'm sharing a coupon code for 20% off this beauty!

>>>>Makes the perfect baby shower gift for someone else, or your own little bundle!<<<<

Use coupon code: HOOT34 at checkout
Snatch it up here

sale baby blanket toddler lovie discount sale coupon code etsy

Saturday, June 28, 2014

Funny things kids say

funny kid quotes, funny things kids say, kids are funny
Strange how quickly a school year can fly by. One day you're picking up your school supplies and the next you're packing them up!

Sewing is the first part of my day and managing kids with an after-school program is the other. There is never a dull moment - which I love! Kids tell it like it is and never cease to amaze me with their kindness, imagination, silliness, love and sense humor which, honestly, most don't even know they have. There's never a day when I don't laugh. And that, as they say, is the best medicine!

Here are a few of my favorite moments from this school year. Trust me, if I wrote them all down we'd been here for a while!

Funny Things Kids Say


The Frizz

After a very rainy day here in Seattle, a 3rd grader said to me (after I've been talking to a whole bunch of different parents):  "What happened to your hair? It's all frizzy!"

The Grandma

Conversation with a 2nd grade boy:
him: "It's like you're my grandma."
me: "I've never been called someone's grandma before." (p.s. I'm no where near that age!)
him: "Well, I keep forgetting if you're part of my family or not. It feels like you're part of my family."
(sooo sweet! and he proceeded to invite me to dinner and his birthday party. Several times.)

The Roots

[Upon coming to school the day after getting my hair/roots colored] Kindergarten girl looks up at me with a puzzled expression and says in her sweetest Kindergarten voice, "Yow haiw used to be bwack" (I still laugh about that one!)

Wikipedia

4th grade girl:
"I am a walking Wikipedia. Wikipedia is amazing. It has everything from toast to glitter. I know because I looked it up."

Overload

Kindergarten girl just arrived for the day: "Why is that teacher wearing glasses? And why is that teacher wearing lipstick? What's going on?? Why so many changes!??"

The Puff

A 3rd grade girl was upset because her straightened hair had become frizzy from the rain. I showed her a trick to smooth her hair with her hands to help. I said, "My hair sometimes gets puffy when it rains, so it's a trick I use too. Then she replied, "But your hair is always puffy. [pause] In a good way."

Young Love

A kindergarten girl and boy were sitting together eating a snack. I walked over to talk to them and she looked up, giggling and said, "We're going to marry each other" [continues giggling] the kindergarten boy looked up at me with wide eyes like, "huh?"

The Big One

Conversation with a 1st grade boy
him: Can I go the bathroom?
me: Yes
him: Good, cuz I've got to take a big one.

Separation Anxiety

Kindergarten girl was telling me about the 2 week vacation she and her family were going on this summer. She ended with, "We'll be gone sooo long! I'm going to miss my stuffies!" then proceeded to tell me about the 10+ stuffed animals she was going to pack in her suitcase.

And my favorite....

Gift for Dad

A 4th grade girl was getting her hair cut and donating it to Locks of Love. We were explaining to a few kids that she would be donating her hair to people who were sick and may not have any hair. A Kindergarten girl raised her hand and said, "You should give some to my dad. He could use some more hair."

Summer has begun and we're in the throws of a move. Hoping to be back posting soon, if I've survived! Ha! Hope you are enjoying your summer!♥

CLICK HERE FOR MORE FUNNY THINGS KIDS SAY // FUNNY KID QUOTES


SUBSCRIBE (never miss a post!): Subscribe to ShannonSews
BLOGLOVIN: ShannonSews on Bloglovin
FACEBOOK: facebook.com/SSorensenDesigns AND facebook.com/FairfaceWashcloths
TWITTER: @ShannonSews1
INSTAGRAM: ShannonSorensenDesigns on Instagram
SHOP: Shannon Sorensen Designs + Fairface Washcloths
YOUTUBE: youtube.com/ShannonSews

Saturday, June 21, 2014

6 Summer T-shirt Projects you don't want to miss!

Now that summer is upon us, it's time to get your craft on! 

Check out these 6 Must-have T-shirt Projects and be sure to add them to your summer activity to-do list!

t-shirt decorating ideas summer kids adults fabric paint, tie dye, ink blot
6 Summer T-shirt Decorating Projects you don't want to miss! © ShannonSorensen

Decorating your own t-shirts gives you countless numbers of ways to express yourself and makes a perfect lazy day summer activity.

 DIY Summer T-shirt Tutorials

Follow these links to get right to the tutorials
Happy Summer!

Choose from a simple to complex design. All you need is a t-shirt, fabric paint, freezer paper, an exacto knife and an iron.

This project is addicting! You'll get a unique, symmetrical design simply by swirling and blopping paint, folding your t-shirt over and tada! You've got one-of-a-kind ink blot t-shirt! Watch me create a few designs on my YouTubeChannel*Ink Blot T-shirt Kits are also available and make a great kids birthday party activity!

Who doesn't love a good tie dye t-shirt in the summer? The popular sunburst design is easy to create with your favorite color dye and a few rubber bands. Use one color or go crazy with two! Cool designs in a snap!

This cute Painted Dots T-shirt can be made by using a round make-up sponge and your favorite fabric paint. Use round make-up sponges for the dots, or try wedges for a geometric design. The varieties are endless!

Making your own imprinted design allows you to capture the detail of an object, and transfer it right onto your t-shirt. Whether you use metal keys, or another interesting object from around the house, you'll be amazed at how cool this design method can be!

Interested in playing around with natural dyes? Who would have thought black beans could create a cool t-shirt dye? I didn't until I tried it. Not only do black beans work well as an all-natural dye, but so do everyday foods like spinach, onions, berries and deep colored spices like turmeric. Although the process requires a little more preparation, it certainly is fun to try!


Once you try some of these fun summer t-shirt decorating projects - I'd love to hear how they turned out!


Linked to:
http://alittleclaireification.com/2014/06/20/patriotic-recipes-crafts-best-of-the-weekend-party/
http://www.reasonstoskipthehousework.com/skip-housework-24/
http://too-much-time.com/
http://www.bedifferentactnormal.com/2014/06/show-tell-saturday-062114.html
http://www.whatscookingwithruthie.com/2014/06/20/super-saturday-49/

SUBSCRIBE (never miss a post!): Subscribe to ShannonSews
BLOGLOVIN: ShannonSews on Bloglovin
FACEBOOK: facebook.com/SSorensenDesigns AND facebook.com/FairfaceWashcloths
TWITTER: @ShannonSews1
INSTAGRAM: ShannonSorensenDesigns on Instagram
SHOP: Shannon Sorensen Designs + Fairface Washcloths
YOUTUBE: youtube.com/ShannonSews

Tuesday, May 13, 2014

How to Sew a Maxi Skirt for Summer

sewing tutorial maxi skirt jersey knit waistband
I first pulled out this cute striped jersey knit fabric about a year ago, when I made my striped summer t-shirt. I still love it and continue to get compliments on it!

I've been itching to sew my own maxi skirt out of the rest of the fabric and I finally got up the courage to do it! It's so funny that after all the projects I've made successfully, I still get nervous that I'll ruin it.

How to Sew a Maxi Skirt

Making your own maxi skirt might just be one of the easiest skirts you can make, especially if you make it with a knit or yoga waistband or elastic. No zipper or darts, as with my straight skirt, although another straight skirt is on my list!

Step 1: Take your measurements: Length & Waist & Hips around widest point (including backside). From those measurements, decide how flowy or clingy you want your skirt and add extra inches to the width of your fabric to compensate for seam allowance + extra fabric. You will cut a separate waistband. Note that your waistband will be stretched to fit snug.

Step 2: Cut out your fabric. I opted for 2 side seams instead of one in the back for my skirt & a 6 inch waistband (12 inches folded over to 6).
sew a maxi skirt with knit fabric and knit waistband

Step 3: Pin, pin, pin! Jersey knit can roll and stretch.
Step 4: Sew your seams. Using a ballpoint needle (to prevent making holes in your fabric) zig-zag stitch up the sides of your skirt and across the 2 short sides of your waistband folded over. A zig-zag stitch allows your jersey knit fabric to move & stretch with you instead of putting pressure on a straight seam.
sewing a jersey knit maxi skirt for summer, tips for sewing with jersey knit

Step 5: Attach your waistband. Mark the back and front middle, along with each side of the skirt and waistband with pins. Line up the points and pin at those points, right sides together. You will have excess fabric from the body. Stretch the waistband and body fabric together as you stitch and it will all come together. (Sorry no photo!) It's a bit of a tug-of-war with the sewing machine, but just be patient. I stretched the fabric while pulling lightly from the back, to ease it through.
how to add a knit waistband to maxi skirt

Step 6: Secure wasitband and tag the back. To keep the waistband sitting flat, from the inside, fold the waistband hem up against the waistband and zig-zag stitch. I finished it off with by stitching a small piece of white jersey on the back inside of the skirt so I can tell which side is which.
how to tell which is the front and back jersey knit maxi skirt

And then you're done! You can hem the bottom if you want to, but I liked the look of it unhemmed. Plus, I was tired and wanted to be finished already! Ha!
how to sew a summer maxi skirt tutorial simple comfy cute

sew a long skirt flowy for summer, jersey knit

I have a feeling this blue and white striped maxi skirt is going to get a lot of wear this summer!


In case you missed it:
DIY striped summer t-shirt
All Tops & Shirt Refashions
Skirt sewing projects and/or refashions

SUBSCRIBE (never miss a post!): Subscribe to ShannonSews
BLOGLOVIN: ShannonSews on Bloglovin
FACEBOOK: facebook.com/SSorensenDesigns AND facebook.com/FairfaceWashcloths
TWITTER: @ShannonSews1
INSTAGRAM: ShannonSorensenDesigns on Instagram
SHOP: Shannon Sorensen Designs + Fairface Washcloths
YOUTUBE: youtube.com/ShannonSews

Monday, April 28, 2014

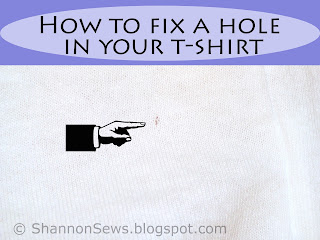
How to fix a hole in your t-shirt: tutorial

fix a hole in your t-shirt tutorial
It's been a while since I've shared a tutorial, and since my how to fix a hole in gauze or light-weight fabric post has been so popular, I thought I'd share how to fix a hole in t-shirts that might also be of help.

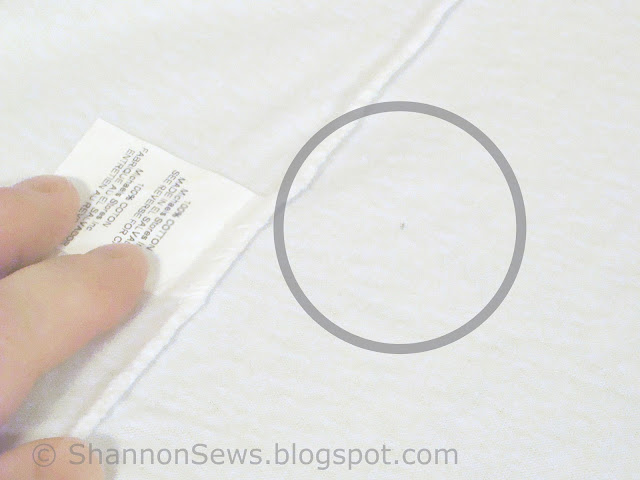
You know those holes. The little ones that suddenly pop up on your t-shirts. Where did you come from?? Let them sit...and slowly they start to get bigger.

Well have no fear! There's a quick and easy way to stop those little t-shirt holes in their tracks and make them look like they were never there at all.

How to fix a hole in your t-shirt

fix a small hole in your t-shirt: quick fix instructions
Supplies Needed
(*product links included)
Stitch Witchery
Light-weight Stabilizer
Parchment Paper
Iron
Ironing Board
Damp, clean, non-terry cloth
Straight Pin or safety pin
Scissors


Step 1: Put a medium-sized piece of parchment paper down on your ironing board. Turn your t-shirt inside out and place it on your ironing board on top of your parchment paper and locate the hole you want to fix. *The parchment paper under your t-shirt will prevent the stitch witchery from accidentally adhering to your ironing board.

tutorial how to fix a hole in t-shirt quick, easy

Step 2: Using your pin, gently pull and tuck the fibers around the hole to come together as closely as possible.


fix t-shirt rip, hole with stitch witchery

Step 3: Cut a small piece of stitch witchery and a bigger piece of light-weight stabilizer. Place stitch witchery directly over t-shirt hole and place stabilizer over the top of that. Turn on your iron according to the stitch witchery instructions and grab your damp towel cover.


DIY fix t-shirt hole with stitch witchery and stabilizer


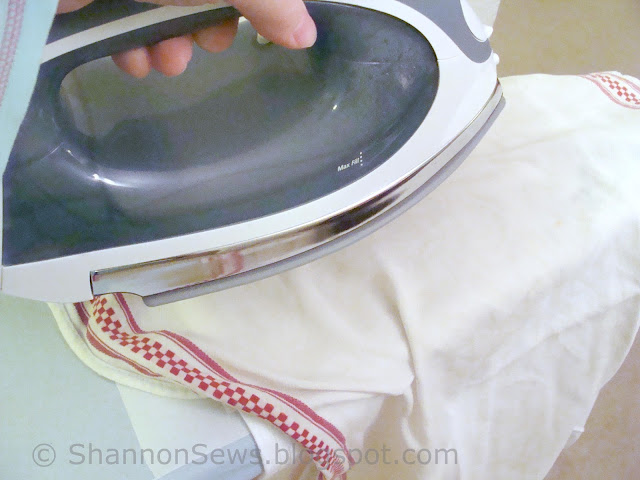
Step 4: [Your layers should be as follows: Ironing board + Parchment Paper + T-shirt + Stitch Witchery + Stabilizer + Damp Cover Towel + Iron]. Following the instructions on the stitch witchery package, "glue" stitch witchery in place.


using stitch witchery mend t-shirt hole

Step 5: Once completed, carefully remove your hot towel and check your results. Check to make sure the hole completely fused closed from the front and the stabilizer is secure inside. Repeat if necessary.

The outside results should appear as if the hole was never there. The inside of the t-shirt will have a small piece of stabilizer attached to secure the fixed hole. You can cut the stabilizer down to be smaller inside if needed.

how to mend a hole in your t-shirt a DIY tutorial


This method also works well on slightly bigger rips by using bigger pieces of stitch witchery and stabilizer.

Remember to check out the post on how to fix holes in light-weight fabric such as a shirt or skirt with this same method, with great results!

*This post contains product links, added for your convenience. As an Amazon Associate I earn from qualifying purchases.


SUBSCRIBE (never miss a post!): Subscribe to ShannonSews
BLOGLOVIN: ShannonSews on Bloglovin
FACEBOOK: facebook.com/SSorensenDesigns AND facebook.com/FairfaceWashcloths
TWITTER: @ShannonSews1
INSTAGRAM: ShannonSorensenDesigns on Instagram
SHOP: Shannon Sorensen Designs + Fairface Washcloths
YOUTUBE: youtube.com/ShannonSews

Sunday, April 13, 2014

Green Household Cleaning Tips & Recipes

green, non-toxic cleaning recipes, alternatives, home and laundry
Green, non-toxic cleaning recipes and tips © ShannonSorensen
I have been obsessed lately with Green Cleaning Alternatives for Laundry and around the House. Obsessed! My Pinterest board overfloweth.

My recent share about removing yellow laundry stains with hydrogen peroxide has been buzzing. I'm guessing there are many of you out there looking for greener alternatives in your lives as well!


Non-toxic Green Cleaning Ideas for your Home & Laundry

Green Cleaning Products:

The first time I used white vinegar and baking soda to clean the bathroom sink, I was over the moon with excitement! It fizzes! It bubbles! It cleans without harsh chemicals!

And at that moment, not only was I hooked on vinegar and baking soda (you had me at fizz), but I was on a mission to find greener, non-toxic alternatives to cleaning my home! Woohoo!

Here are a few of my favorite must have's:

BAKING SODA (fights odors and gently scrubs)

WHITE VINEGAR (antifungal, kills germs and bacteria) - part vinegar + part water + pure peppermint essential oil = great multi-purpose spray (with minimal vinegar scent)

HYDROGEN PEROXIDE
 3% - powerful disinfectant *especially when sprayed over vinegar - not pre-mixed; whitener and alternative to bleach, so careful where you spray it.
Tip: Once open, hydrogen peroxide begins to deteriorate its effectiveness. Keep stored in original brown container and swap off a spray top from another bottle to spray directly.

PURE ESSENTIAL OILS not only smell great, but have cleaning/anti-fungal properties, depending on the oil.

DAWN DISHWASHING LIQUID not sure how "green" it is, but it de-scums showers, aids in removing yellow sweat shirt stains and re-de-fines what I thought dishwashing liquid could do!

SPRAY BOTTLES I stocked up on empty spray bottles at Home Depot - good quality for under a dollar each!

GLASS CANNING JAR (or other like container) to store/shake Baking Soda. Poke holes in the top of the lid and use it to shake out baking soda for cleaning jobs.

CLEANING RAGS to be used and washed millions of times to eliminate waste!


Green cleaning Recipes and Uses:


KITCHEN
My go-to all purpose cleaner for Counters, Stove & Sink - mix 50 white vinegar / 50 water solution + pure peppermint essential oil in a spray bottle and use as daily anti-fungal/disinfectant to wipe down counter, stove top and sink. For a little extra scrub, after spraying the 50/50 mix, shake baking soda in the sink and let it fizz. Then wipe clean. Awesome.

If cooking with raw meat, spray hydrogen peroxide over the top of the 50/50 spray and then wipe. (*see note above for hydrogen peroxide)

I have also put a couple drops of pure lemon essential oil on a warm rag and wiped everything down after spraying with the 50/50 mix. Mmmmm. It smelled so fresh and bright! It's fun to try different essential oils.


BATHROOM:

Tub: Option 1
Straight vinegar or 50/50 mix (depending on cleaning need). Heat in microwave and pour warmed mixture into spray bottle. Add a few generous squirts blue Dawn liquid soap. Shake. Spray shower and tub down generously. Leave to let soak. After soaking, wipe down and rinse. *Modified from One Good Thing by Jillee

**This mix works like a charm, but smells really strong (especially when using straight vinegar) and can be a bit overwhelming while sprayed. Make sure to run your exhaust fan and leave the door/window open for ventilation. ***Another option that I like is to combine this cleaning mixture in a bucket and use a rag or sponge to wipe it over all tub and shower surfaces and let sit, instead of spraying it on...although I could do without it dripping down my arm...

For a mild scouring powder: shake baking soda around the tub. Spray with a little 50/50 mix and scrub.

For mildew spots: Mix hydrogen peroxide + baking soda into a paste. Apply with an old tooth brush to mildew spots and let sit for 30 minutes or so before rinsing.


Tub: Option 2
Mix a squirt of liquid soap (i.e. castile liquid soap: see also natural cleaning solutions) + pure essential peppermint oil to 1 c. baking soda. Form a paste by adding water to the mixture and use it to scrub your tub and sink. *adapted from Martha Stewart

***This mix worked great, although a little more scrubbing than option 1. The peppermint smelled like I collided with a toothpaste truck. In a good way. Fresh and clean. Other antibacterial essential oils you could choose from are: tea tree, eucalyptus, or rosemary. Here's a link to an Essential Oils Directory I found (just a resource, not a product endorsement).

For mildew spots: Hydrogen peroxide mixed with baking soda into a paste. Apply with an old tooth brush and let sit 30+ minutes before rinsing.


Sink/Vanity
Spray 50 white vinegar/50 water mixed with + your favorite essential oil all over sink and vanity. Shake baking soda on top of spray to use as mild scrubber. I sometimes spray hydrogen peroxide over the top of the vinegar/water mix to act as an extra disinfectant. Wipe everything down.

For a lingering fresh smell: After cleaning, take a cotton ball with a few drops of essential oil and wipe around areas that won't get wet, to leave a fresh scent throughout the bathroom for longer. (so far I have used lavender and lemon)


Toilet
Spray 50 white vinegar/50 water spray followed by Hydrogen Peroxide sprayed right out of the brown bottle all over the toilet and seat. Wipe down.
Toilet Bowl- Spray 50/50 vinegar/water mix under the rim and in the bowl and shake baking soda all over inside bowl. Let it fizz...use toilet brush to scrub. Spray Hydrogen Peroxide under the rim with the original brown bottle, + in the toilet, and let it sit for 30 min. without flushing.


LAUNDRY
▪Pre-lauder: erase yellow ring-around-the-collar or other yellow shirt stains with this recipe. It really works!
▪Brighten whites with 1/2 c hydrogen peroxide to laundry wash cycle
▪Add 1/2c-1c vinegar to rinse cycle as a natural fabric softener
▪Add shakes of baking soda to wash cycle to soften and remove funky smells
▪Add a few drops of pure lavender essential oil to rinse cycle for sheets, towels or all your loads!

I am thrilled with these greener, cleaner, non-toxic cleaning options! True, you have to get used to it smelling like you just dyed Easter eggs once-in-a-while from the vinegar smell, but by adding peppermint essential oils, it takes most of the harsh vinegar smell away.

♥♥♥♥♥♥♥♥♥♥♥♥♥♥
+I have re-defined what it means to have a clean home.
+Clean doesn't mean harsh chemicals or bleachy smells.
+I am amazed at how clean things can be with the purest of ingredients.
+Try it - you'll be hooked!


SUBSCRIBE (never miss a post!): Subscribe to ShannonSews
BLOGLOVIN: ShannonSews on Bloglovin
FACEBOOK: facebook.com/SSorensenDesigns AND facebook.com/FairfaceWashcloths
TWITTER: @ShannonSews1
INSTAGRAM: ShannonSorensenDesigns on Instagram
SHOP: Shannon Sorensen Designs + Fairface Washcloths
YOUTUBE: youtube.com/ShannonSews

Friday, February 7, 2014

DIY Bath & Body Works Foaming Hand Soap

copy cat bath and body works make your own foaming hand soap refill peppermint
My sister gave me Twisted Peppermint Foaming Hand Soap from Bath and Body Works for Christmas. Mmmmm! It smells SO good and lifts my spirits every time I use it!

Did you know that Peppermint oil has been shown to increase energy and mental clarity? Um, yes to both please!

So as the bottle began to run low, you can imagine my feelings of woe, never wanting this magic bottle of foaming hand soap to end....so when I stumbled upon this great DIY recipe for foaming hand soap, from Wellness Mama, I knew I'd hit the jackpot!

Bath & Body Works Peppermint Foaming Hand Soap DIY


By combining simple ingredients like distilled water, Peppermint Castille Soap (liquid)  & a dash of oil (I used jojoba oil since it's what I had on hand), the perfect copy cat version of Bath and Body Works Twisted Peppermint foaming hand soap was born! No more crying, now I have a lifetime of refills! And energy to boot!

Be sure to check out the recipe - it's so easy to make! Other DIY foaming hand soap recipes use vegetable glycerin instead of a colored oil and I think I'll do that next time, since it does leave a little yellow jojoba oil floating on top. But nothing a little shake-shake can't help.

I love using DIY skin care products and household cleaning products when I can, because I know exactly what I put in them and always look for gentle ingredients that won't irritate my sensitive skin. My next batch will be using Lavender Castille Soap to make my own foaming shower soap! It only seems to work in a foaming soap container, so don't throw them out when you're done with the bottle!

SUBSCRIBE (never miss a post!): Subscribe to ShannonSews
BLOGLOVIN: ShannonSews on Bloglovin
FACEBOOK: facebook.com/SSorensenDesigns AND facebook.com/FairfaceWashcloths
TWITTER: @ShannonSews1
INSTAGRAM: ShannonSorensenDesigns on Instagram
SHOP: Shannon Sorensen Designs + Fairface Washcloths
YOUTUBE: youtube.com/ShannonSews

Monday, February 3, 2014

Decorating with a cream couch: budget-friendly front room make-over

redecorate on a budget with cream light colored leather couch
Once there lived a man and his wife who finally decided it was time to be grown-ups and buy a couch of their own.

And so the story goes, they lived happily ever after...and became a couple of lazy couch potatoes.

The End.

Decorating with a Cream Leather Couch

You may be hesitant to decorate with a cream or light-colored couch, but it has the potential to turn your drab and dreary to downright dreamy.

I was very skeptical, myself. "STAINS!" was all I could think about. And leather? "Am I even a cream leather couch person??" Enter: mini-crisis of re-discovery.

But since the day it was delivered, we can't be more in love with it. It's like butta baby!! So soft and so comfortable. It not only brightened up our room a million times over, but it brought some grown-up sophistication to our front room decor (and no, I did not tag team that off of Katherine Lowe's wedding theme "grown-up sexy"). In a nutshell? We. Love. It.

Okay, take a look (if you haven't already jumped)

Front room make-over reveal: Cream Couch

BEFORE 
(don't even say it)
redecorating on a budget with a cream light colored couch
.
.
.
.
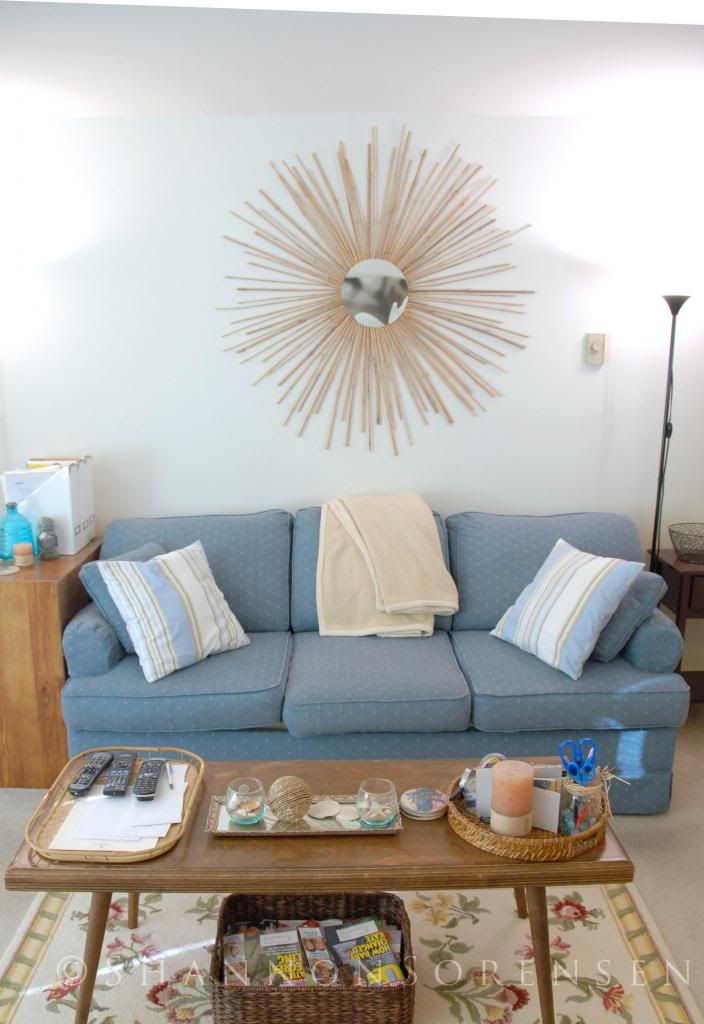
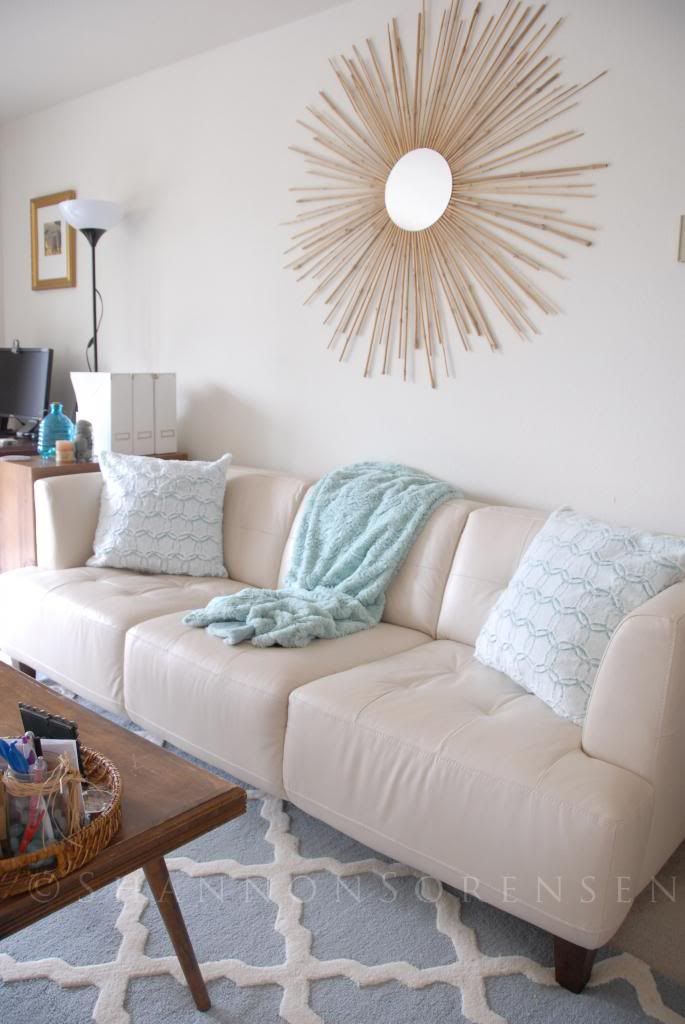
AFTER decorate with cream couch light colored couch make-over after
before and after room make-over reveal with white, cream, light couch area rug decorating cream couch makeover

Decorating on a Budget | Front Room Make-over Details

Determine a budget

Re-decorating on a budget is definitely do-able, but the trick is taking your time and doing your research to find great deals. We wanted a new couch for a long time, but it took a while before we found the right couch at the right price. Take advantage of holiday sales, 0% for a year pay-off deals, discounted items, gift money, even thrifted items if in good condition. You can save a ton and still get what you want. Just be diligent and patient.

Creating a palate

Decorating with a cream or light-colored couch is the perfect way to bring in lots of color to compliment your neutral base. You don't want colors all over the map, so decide on what kind of feel you want in your room and what colors would compliment best. I went for Beachy Chic and splashed around colors like aquas, blues, sea greens and sandy tans, to compliment and brighten the space.

Choosing a Couch

Choosing a neutral base was important for us, so we could brighten our space and build color around it. By choosing leather, it made the space feel a little more modern with a touch of sophistication, without being stuffy.
-Couch from Macys Furniture Store, style: Alessia Leather Sofa - Pearl - *Black Friday Sale


Choosing an Area Rug

Choosing the right area rug for your room can literally transform it. It's important to make sure the size and color work for the space. Not only did the blue and cream Moroccan Trellis Rug tie everything together, it helped to anchor the couch and coffee table as a defined space, allowing the other areas of the room to be have their own space.
-Homespun Moroccan Trellis Rug - Spa Blue - from Rugs USA - *80% off 


Adding Accessories: Pillows & Throws

One of the really fun parts of decorating with a new cream sofa is adding throw pillows and blanket throws for pops of color. Each item brings in its own unique touch, while creating a sense of cohesion.

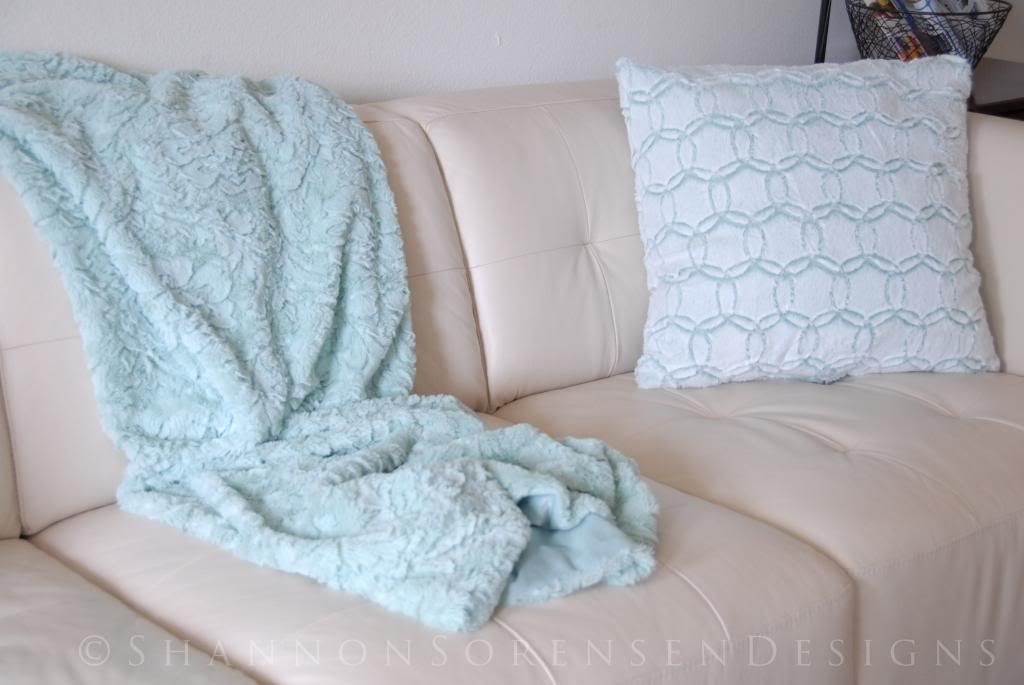
Keeping with our chosen palette, I decided on light aqua, soft, faux fur throw pillows (20"x20") which not only brought in the soft brightness of color I wanted, but also brought in a great texture. Don't forget texture is an important detail to integrate into any space!

THE SOFT FAUX FUR BLANKET THROW is a deeper color within the same color family - more along the lines of sea foam green and compliments the pillows, rug and couch perfectly to give the room that Modern Beachy feel. Plus it's so cuddly soft that it's actually something we love to use, instead of something we just look at.
-Faux Fur Pillows and Throw from HomeGoods - *holiday gift card


decorate with bamboo sunburst mirror wall art

Bamboo Sunburst Mirror Wall Art

I made the Bamboo Sunburst Mirror a few years ago. It was easier than I thought it would be, with stunning results! See this post on how to make your own DIY Suburst Mirror
-DIY ~$14.00 total materials cost


Coffee Table

We didn't splurge on a new coffee table, (although I'd love one!), but this thrifted, 60's style coffee table is perfect for our space at the moment. I tied in accessories that brought color such as aqua glass, texture: rope tied nautical balls, woven & bamboo baskets/trays, and a touch of antique with a thrifted antique mirror used as a tray.
- Thrifted


decorating with a light colored couch accessorize with colors and nature

Other Accessories to add color and texture to a room

Make your space personal with framed photos, wall pictures, candles, lamps, + don't forget to bring the outside in! Plants, rocks, sand, grass, shells, wood, flowers, etc. bring freshness and variety from nature's own textures, colors and diversity.

We still have a long way to go, but it's definitely a good start. I'd love to replace our bookshelf, side table and lamps, but a girl only has so much cash! I reeeeaaaalllly had to hold myself back.

I love how it turned out. It makes me happy every time I walk in the room!
And after almost 2 months, no stains! (knock on wood!)

Update: still no stains after 6 months and counting! Woohoo!


SUBSCRIBE (never miss a post!): Subscribe to ShannonSews
BLOGLOVIN: ShannonSews on Bloglovin
FACEBOOK: facebook.com/SSorensenDesigns AND facebook.com/FairfaceWashcloths
TWITTER: @ShannonSews1
INSTAGRAM: ShannonSorensenDesigns on Instagram
SHOP: Shannon Sorensen Designs + Fairface Washcloths
YOUTUBE: youtube.com/ShannonSews

Wednesday, January 22, 2014

Clear Skin Tip: from Fairface Washcloths™ for sensitive skin

clear skin tip help keep skin clear with clean pillow cases
{photo courtesy of marin, freedigitalphotos.net}
I love sharing Clear Skin Tips from Fairface Washcloths™ because let's face it, who doesn't want clear skin??

Clean Pillow Case = Clearer Skin

Did you know something as simple as changing your pillow case more often can actually prevent break-outs and help maintain clearer skin?

Think of all the things that are on your pillow case throughout the night. Every night. Lotion residue or other skin care products, breath, saliva, skin oils, hair oils, sloughed off skin, hair dander, pet dander (if you let pets sleep with you. I cringe), dust mites and other allergens. Need I go on?

If you re-use the same pillow case over and over again, it stands to reason that some, if not all of these irritants, will effect your skin in one way or another by irritating your face and clogging your pores.

Flip your Pillow Case for Clearer Skin


If you don't have 7 pillow cases on hand for a fresh one every night of the week, this simple trick helps minimize the number of pillow cases used while maintaining cleaner skin.

Clear Skin Pillow Case Schedule

Night 1: Use a fresh, clean pillow case
Night 2: Flip pillow over to use the clean pillow case side
Night 3: Use a fresh, clean pillow case
Night 4: Flip pillow over to use the clean pillow case side
Night 5: Use a fresh, clean pillow case
Night 6: Flip pillow over to use the clean pillow case side
*Launder and re-start the schedule

This is the pillow case schedule I now live by! I tried it a few years ago and quickly noticed how much fewer break-outs I had and how much better my skin looked. Even while *traveling, I bring a few extra pillow cases so I never have to worry about keeping my skin clear.
(*laundry services at hotels use bleach and other harsh chemicals to wash bed linens. I always bring my own pillow and pillow cases to keep my sensitive skin safe from redness and irritation brought on by these harsh detergents)

A few last quick tips

  • I'll share a tutorial with you on how to make your own quick pillow cases out of an existing sheet if you need to make your own instead of invest in a few. 
  • For sensitive skin, like mine, it's not only important to use soft fabric pillow cases, it also helps to wash them in hypoallergenic detergent and dry them without any fabric softeners or opt to use hypoallergenic fabric softeners to prevent skin irritation.
  • Don't forget to change and launder your sheets regularly too, to prevent those same bedroom allergens and irritants in your sheets from affecting your clear skin!

Wishing you many days ahead of happy, clear skin!


This Clear Skin Tip brought to you by: Fairface Washcloths
the best soft washcloths for sensitive skin

soft flannel face cloths for clearer skin

Available at FairfaceWashcloths.com


Tuesday, January 7, 2014

Remove yellow shirt stains + ring around the collar with hydrogren peroxide

natural bleach alternative get ride of yellow collar stains mens shirts
I often get obsessed with things, and then leave them in the dust for the next big thing. I'm fickle that way.

Not long ago it was all about inkblot design, then it was painting thrifted furnituredyeing clothes with commercial dye and then making natural dye from black beans.

Then it was stenciling, making DIY lavender water (although I'm still in that phase), home decor, and now I'm all about "DIY Green Cleaning" my house and laundry.

You should see my Practical/Useful Pinterest Board! It quickly turned into a mass of vinegar, baking soda, lemon, essential oils and hydrogen peroxide cleaning recipes. And it's official. The next obsession has begun.

Don't even get me started with DIY green house cleaning tips, or I'll have you here til midnight, so lets save that for another post. Today, I'll share a whitening non-bleach alternative laundry tip that saved us $200 in men's dress shirts! The miracle cure for removing yellow shirt stains and ring around the collar from my husband's dress shirts. They are like NEW!

Remove yellow stains + ring around the collar

Okay, lets give you the before and after again. Just for the shock effect.
BAM!
using hydrogen peroxide in your laundry to whiten yellow shirts
  It's totally real. Not just photoshopped. It will change your life. It will save you money. Let me tell you how its done.

I stumbled upon this miracle cure for removing yellow shirt stains on One Good Thing, by Jillee. If I could hug her, I would. She has a great blog with lots of fantastic tips.

Non-Bleach Alternative for removing yellow shirt stains

What you'll need (*includes product links for easy access):
Small bowl to mix
Scrub brush (mild enough for clothing)
Surface to scrub (inside kitchen sink works well )

Ingredients:
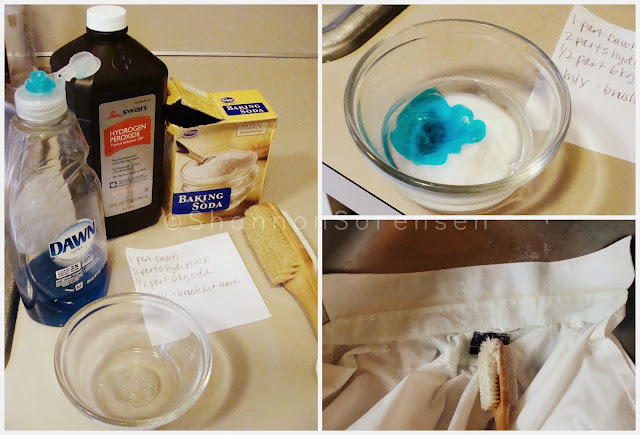
1 part blue Dawn liquid dish soap (*I used 1 Tbsp)
2 parts Hydrogen Peroxide (*2 Tbsp)
1/2 part Baking Soda (*1/2 Tbsp)

Instructions:
Mix together Dawn, Hydrogen Peroxide, and Baking Soda
Gently spoon/pour mixture onto yellow areas
Scrub mixture into shirt with scrub brush
Leave untouched for about 2 hours (that worked for me)
Launder as usual

use hydrogen peroxide to remove yellow collar and mens shirt stains

My husband was shocked and amazed when he came home to see his "new" white dress shirts!
I didn't spare him any details on how I had miraculously saved the day. ha!

*Update: FOR COLORED SHIRTS: I tried it on my husband's light blue shirt and it worked about half as well as it did on white. However, it did remove enough of the stain to make the shirt wearable, so good enough for me!
green laundry using hydrogen peroxide to whiten and remove yellow collar stains

*This post contains product links through Amazon.com and as an Amazon Associate we earn from qualifying purchases.

Linked to: http://www.aglimpseinsideblog.com/, http://www.livelaughrowe.com/, http://www.thecraftyblogstalker.com/, http://www.allthingswithpurpose.com/, http://www.iheartnaptime.nethttp://www.keepingitsimplecrafts.com/ http://sewmanyways.blogspot.com,  http://www.flamingotoes.com,  http://www.niftythriftythings.com/,  http://www.thegirlcreative.comhttp://diyshowoff.com/,  http://www.linesacross.com/,  http://www.sewcando.com/,  http://www.craft-o-maniac.com/,  http://www.skiptomylou.org/,  http://www.madincrafts.com/,  http://www.ishouldbemoppingthefloor.com/, http://www.allthingswithpurpose.com/ 

SUBSCRIBE (never miss a post!): Subscribe to ShannonSews
BLOGLOVIN: ShannonSews on Bloglovin
FACEBOOK: facebook.com/SSorensenDesigns AND facebook.com/FairfaceWashcloths
TWITTER: @ShannonSews1
INSTAGRAM: ShannonSorensenDesigns on Instagram
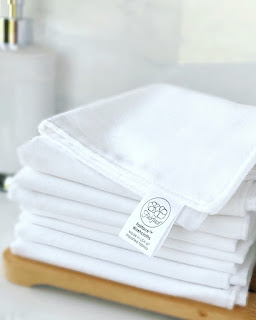
SHOP: Shannon Sorensen Designs + Fairface Washcloths
YOUTUBE: youtube.com/ShannonSews
Blogging tips